
Comlite Customer Service

Troubleshooting
The Comlite software is a product that makes extensive use of the capabilities of .Net 4.x and the Windows Communication Foundation (WCF). Because of this, there may be problems getting the Administrative station to communicate with all of the Client stations. When problems occur, check your Windows Firewall configuration first.
License Management
Licensing
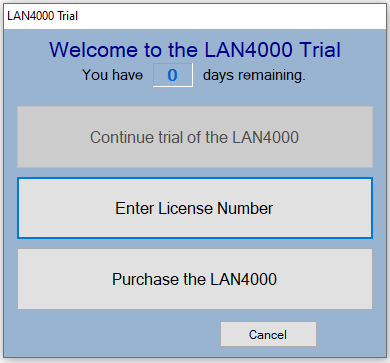
- When you receive your Comlite key (example: N9IO3W-TJKG-9ZZ) insert it into all the Comlite Stations. Click on Enter License Number. The number is case sensitive and needs to be entered exactly as it appears including the dashes.
You can also enter your license key by clicking on the “Comlite” name at the top of our interface. This will open our about box (see below) where you will be able to click on ‘Enter License”
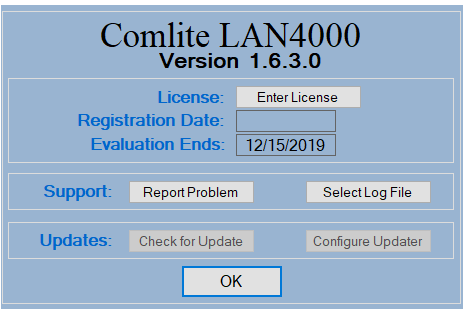 Once your Comlite stations are licensed, clicking on the “Comlite” name at the top of any station will show you your license key.
- Re-using Licenses: Comlite attaches the license key to the MAC address on each computer on which it is licensed. If you need to upgrade or replace a computer you can uninstall Comlite from the outgoing computer, (Control Panel/Programs and Features/LAN4000) which will free up the license to be re-used on the new incoming computer. Note: If you have a hard drive crash or are unable to uninstall Comlite from the outgoing computer you will need to call customer support to have them free up your license key. 800-426-5271
Moving The Administrative Station
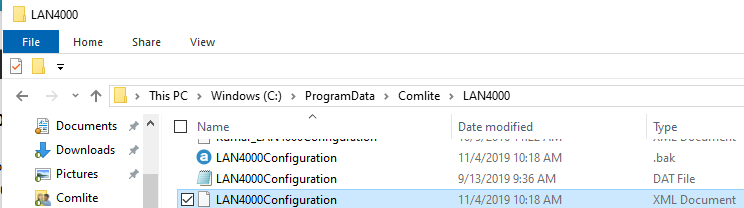
1. Copy the Administrative Configuration file. This file contains the customization information for your office button layout. Go to C:/programdata/Comlite/LAN4000
Note: If you don’t see the “Programdata” folder it is hidden. To unhide this folder go to Control Panel/File Explorer Options, choose the “View” tab, then click Show hidden files, folders, and drives. Then click Apply and OK. The Programdata folder will now appear.
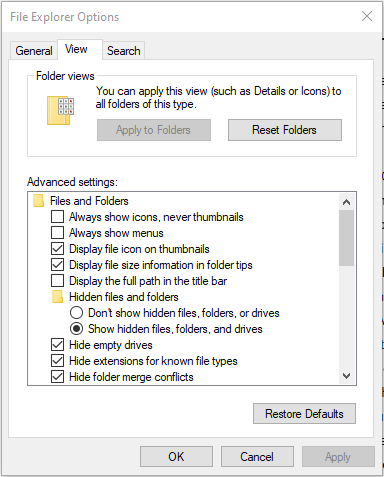
Continue to step 2.
2. Copy the file LAN4000Configuration.xml Note: This file should have a recent date modified (todays date or if you leave your PC’s on all the time, the most recent date). For customers that have updated from versions 5.x.x.x or older, the file you may need to copy is LAN4000Configuration0.xml (check for the most recent date). If you have renamed your Configuration file to something else (ex. MyOfficeConfiguration.xml) copy that file.
3. Save this file to a location or device where you can access it from the PC you are moving the Administrative station to.
4. Exit the Comlite Administrative Station.
5. Install the new Comlite Administrative Station. (Continue in the trial for now) After it launches, exit the new Administrative Station and paste the LAN4000Configuration.xml into the C:/programdata/Comlite/LAN4000 (Choose Copy and Replace)
6. Launch the new Comlite Administrative Station and you should see your custom button layout.
7. Uninstall the old Comlite Administrative Station (this frees up the license to be reused on the new Administrative Station) Insert your license key in the new Administrative Station.
No Connection Light


The LAN4000 should always launch and display the main screen with the connection light on (yellow). The image on the left is what is expected to be displayed. When the program launches with the connection light off (orange, the image on the right), there has been a problem communicating with the network.
The LAN4000 Client displays its status as it launches. Check this status for error messages. The LAN4000 Administrative Station displays its status on a separate status screen. If the LAN4000 Administrative Station starts up without turning on the connection light, press the Status button. If there was a problem connecting to .Net 4 there should be a description of the problem on the screen.
If no problem is displayed, check your Windows Firewall to determine if the program is being blocked. There should be an “exception” for “LAN4000.exe”. See the next section for instructions on how to create an exception manually.
Normally, the first time the LAN4000 software is launched, a screen like the one shown below is displayed:

You must press “Allow access” for the software to function properly. By allowing the LAN4000 access to your network, it can locate the other stations and communicate with them.
Windows Firewall “Exceptions”
Windows 7
1. Press the “Start” menu button and then select “Control Panel”.
2. Select “Windows Firewall”.
3. Click on the “Advanced Settings” tab.
4. Select “Inbound Rules” from the left side of the dialog.
5. Select “New Rule…” from the “Inbound Rules” area on the right side of the dialog.
6. Select “Program” and then “Next”
7. Select “This program path:” and press the “Browse” button. The default location of the LAN4000 software is “C:Program FilesComliteLAN4000” or “C:Program Files (x86)ComliteLAN4000” if you are running a 64-bit version of Windows.
8. Press “Next”.
9. Select the “Allow the connection” radio button and press “Next”.
10. Select the appropriate check boxes (Domain, Private, Public) for “When does this rule apply?”. The default is for all of the entries to be checked.
11.Press “Next”.
12. Enter a name and description for this exception, like “Comlite LAN4000”.
13. Press “Finish”.
Once the rule is created, it can be edited by selecting it from the list of inbound rules. Once selected, a list of options for this rule is displayed on the right side of the dialog. Select “Properties” to edit the rule.
Windows 10
1. Type “Control Panel” in the search window on the lower left task bar.
2. Select “Windows Defender Firewall”.
3. Click on the “Advanced Settings” tab.
4. Select “Inbound Rules” from the left side of the dialog.
5. Select “New Rule…” from the “Inbound Rules” area on the right side of the dialog.
6. Select “Program” and then “Next”
7. Select “This program path:” and press the “Browse” button. The default location of the LAN4000 software is “C:Program FilesComliteLAN4000” or “C:Program Files (x86)ComliteLAN4000” if you are running a 64-bit version of Windows.
8. Press “Next”.
9. Select the “Allow the connection” radio button and press “Next”.
10. Select the appropriate check box/boxes (Domain, Private, Public) for “When does this rule apply?”. The default is for all of the entries to be checked.
Note: Check only “Private or Domain” depending on your network configuration
11.Press “Next”.
12. Enter a name and description for this exception, like “Comlite LAN4000”.
13. Press “Finish”.
Once the rule is created, it can be edited by right-clicking on it from the list of “inbound rules”. Select “Properties” to edit the rule.
Firewall Settings
Normally, the first time the LAN4000 software is launched, a screen like the one shown below is displayed:
You must press “Allow access” for the software to function properly. By allowing the LAN4000 access to your computer, it creates a firewall exception for Comlite so it can locate the other stations and communicate with them.
Windows Firewall “Exceptions”
Comlite has an application built into our interface to automatically update your firewall settings to the correct configuration. Click on “Setup” Then click on Firewall “Display” to open the LAN4000 Rules Window. Below is what the setting should look like. If it shows the “Profile” as “Public” or “All” click on “Update” and it will delete the current setting and write a new one. The Profile should say “Private” or “Domain” depending on your network configuration.

If the Profile does not change to Private or Domain you will need to take the following steps.
1. Type “Control Panel” in the search window on the lower left task bar.
2. Select “Windows Defender Firewall”.
3. Click on the “Advanced Settings” tab.
4. Select “Inbound Rules” from the left side of the dialog.
5. Right-click on the Comlite LAN4000 entry
6. Choose Properties
7. Choose Advanced
Note: Check only “Private or Domain” depending on your network configuration
8. Choose Apply and OK

Below is what your Firewall Settings should look like.
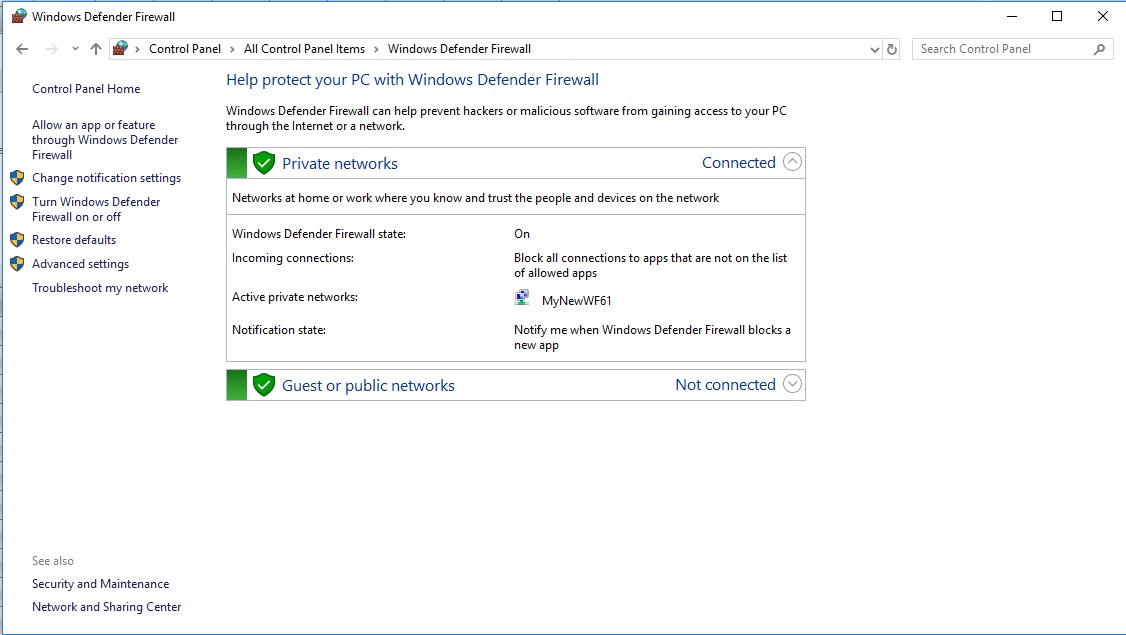
Sometimes the Firewall is “On” but the Connection is for the “Public Network”. To Change the “Connection” from Public to Private or Domain. Go to Windows Settings/Network & Internet/Status Then click on “Change Connection Properties”

Now Change the Network Profile to “Private”


Button Response Is Delayed
The primary reason for a significant (more than 5 seconds) delay is usually because a PC has suddenly disconnected from the Admin station (by crashing or being turned off by shutting down because of a low battery). The LAN4000 Admin will detect this disconnect and drop the PC from the Connection list, but this process may take up to 20 seconds. Once the PC is removed, button response times should return to normal.
NOTE: If the offending PC reboots and reloads the LAN4000 software before a button is pressed, there may be two entries for the same PC in the Connection list. This is normal. One of these entries will be removed after a button is pressed (but it may take up to 20 seconds).
Incorrect Firewall settings can also cause a delay. (See Firewall Settings section)
Intermittent Connectivity - Administrative Station Drops Client Stations
First, verify that the Administrative station can communicate with the network. The Connection light should be on and the status should indicate that the admin station is connected to the network. Second, launch a client station and verify that the station connects to the admin station. The client station name should appear in the admin station status screen. Third, press a button on the client station. If a communication error occurs, verify that a firewall exception has been created for the client (see the section on firewall exceptions below).
If no communication error occurs, press a button on the admin station. If a communication error occurs then the admin station may need a firewall exception.
NOTE: It is recommended that the Administrative station be installed on a Windows 10 or Windows 11 PC. The networking is much more stable than installing the Administrative station on a Tablet.
Assigning Chime Tones
To Change Chime Tones:
- Click on “Setup” on the Comlite Administrator Station
- Click on the Screen Tab in setup
- You can hear the various Chimes in the Chime Section.
- Select the chime you like ( 1, 2, 3 etc.)
- Then click on the buttons on the right side and they will light up with the corresponding Chime number indicating that they are using that chime sound.
- Make any/all changes
- Hit SAVE
Remote Support
FOR REMOTE SUPPORT: Call our Tech Support 800-426-5271 Then CLICK ON THIS LINK https://sos.splashtop.com
Download and run the program from the link. It will show you a 9-digit session code. Give the session code to our support representative and they will connect to your device.
Installation
Comlite LAN4000 Quick Installation Guide – Please read before continuing!
Prerequisite: Microsoft .Net 4. If you do not have .Net 4, this installer will allow you to download and install it.
The Comlite LAN4000 is an easy-to-install system that consists of two parts:
1) An Administrative Station PC – This is a PC that is dedicated to maintaining the configuration for all other attached (Client) PCs. This PC must always be “awake”. Comlite recommends a Windows 10 or Windows 11 PC for this task (if available).
2) Multiple Client Station PCs – These PCs “talk” to the Comlite Administrative PC.
To install the Comlite LAN4000, follow the steps below:
1) First, choose a PC to be the Administrative PC. This PC must be able to run .Net4 and always stay “awake”. (This PC must be a location that allows the Administrative Station to always be running while your office is open for business.)
2) Launch the Comlite Installer on the Administrative PC.
3) Follow the directions for installation.
4) Select “Administrative PC Installation”.
5) Choose the installation location for the Comlite software. Press “Next”. It is preferred that you choose our default location.
6) Press “Next” to start the Installation process.
7) Repeat this process on the other PCs in your network but choose “Client PC” for those installations.
8) Once launched, the installations should automatically locate and communicate with each other.
9) If you are upgrading, upgrade all of your LAN4000 PCs before restarting your LAN4000 network. After upgrading all of your stations, select “Setup” on your Admin station and press “Save” to update the configuration on all client stations on your network.